Winter is boring. And although this winter barely deserves the name 'winter', having had hardly any snow, it still most definitely qualifies as boring. Since I don't have much gardening stuff to talk about right now, I decided to record for posterity a few around-the-house projects the Girl and I have been working on. Most are even remotely nature connected. Sort of.
If you have a kid, collected random objects from nature, and glitter glue, you've got potential for decent kid-friendly project to kill a boring winter morning's time. Careful now, this one's complicated:
1. Take kid outside w/ ice cream bucket to gather up pine cones that fall by the bushel out of old-man-neighbor's hideously pruned pine trees along the property line. Kid will find tons, since there's no snow covering them up (you suck, 'winter').
2. Help kid roll pine cones in glitter glue (we prefer silver) on a paper plate. Let them dry.
3. Put in clear glass bowl. Voila.
 |
| God, winter is boring. But pinecones are pretty! |
Last fall we got the Girl a little toy kitchen secondhand and I figured she needed an apron so she could dress like a real chef and help me cook. As if I ever dress like a real chef while I cook. I'm usually in pajamas all day in winter, aren't you? No? OK, me neither, then.
While roaming through Target killing some boring winter time one day, I saw a cute kitchen towel w/ red apples on it (see, still gardening related, right? whatever, it's my blog) and I decided it wanted to be an apron w/ red apples instead of a boring old towel w/ red apples.
 |
| Appley cuteness |
For the record, the towel measured 29" long x 18" wide. It doesn't matter, what matters is it's roughly a kid's body-sized rectangle. I didn't have a pattern, so just made all this stuff up. We don't need no stinking patterns. If you want to make this, do it my way or do it your much better way and then please don't tell me how stupid my way was. Or do, maybe I'll learn something. And then promptly forget it because my brain is like a sieve. Oh well.
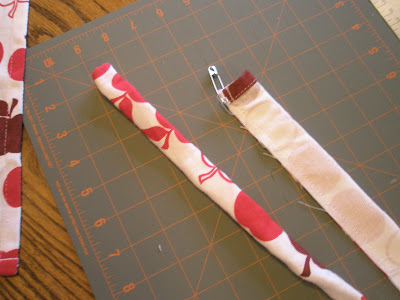
Anywho, I ripped out the stitching of the top hem, and ironed the fabric out flat. Then I cut off four 2.5" strips, to be used to make ties for around the neck and waist of the apron:
 |
| Rotary cutters are handy, but not totally necessary for this project. |
 |
| And so it begins... |
 |
| The end is in sight... |
Next, I took the remaining towel, folded in half the long way, and cut off the corners of the top of the apron in a quarter circley type fashion, per this picture:
 |
| Did I measure? Of course not, you know me, so maybe draw w/ a pencil on fabric and hold it up to a kid until it looks like an apron shape. Way easier than measuring (?) |
Then, fold the towel back out flat, and fold the raw edges of the arm curves over twice, about 1/4" each time, and stitch to hem. Then do the same for the top raw edge of the apron.
If I had this to do over again, I would have done the top first, and the arm curves next, and would have sewn the ties into the arm curve seam at the same time. Know what I mean? No? I'm not sure either. Maybe it would have worked better though.
 |
| Hemming, a necessary evil. |
Then go ahead and stitch the ends of your tie tubes shut, and sew ties onto apron at neck and waist:
 |
| Putting on ties |
Perhaps you'll want to get fancy and add a pocket? Me too. I made one out of a scrap from the arm curves. Take one of the scraps and square it up. I used the still intact side edge seam of the towel as the top of my pocket:
 |
| Pocket progress |
Before you get too crazy though, look at where you're going to place your pocket. I couldn't get the pattern to match up or look remotely decent, so I purposely turned the pocket 90 degrees so it would show up better against the background. Figure out placement and orientation, and then hem:
 |
| Pocket square ready to sew on |
 |
| Pocket square on, ta da! |
 |
| Merry Christmas, Girlie! Hooray! She likes her apron! |
 |
| Oh, wait, she doesn't like it. Sigh. |
Very cool Stephen.
ReplyDeleteGreat apron idea! I think I will try to find fabric to make a couple for gifts for Valentine's Day.
ReplyDelete